

In this article we will be reviewing how to create an automated Kubernetes Cluster that works across all three cloud providers seamlessly using JBC Labs Composer. Composer provides automated deployments and hooks and allows for full integration with your existing containers or services. At the end of this article we will discuss how you can do the same on your side with little to no effort required.
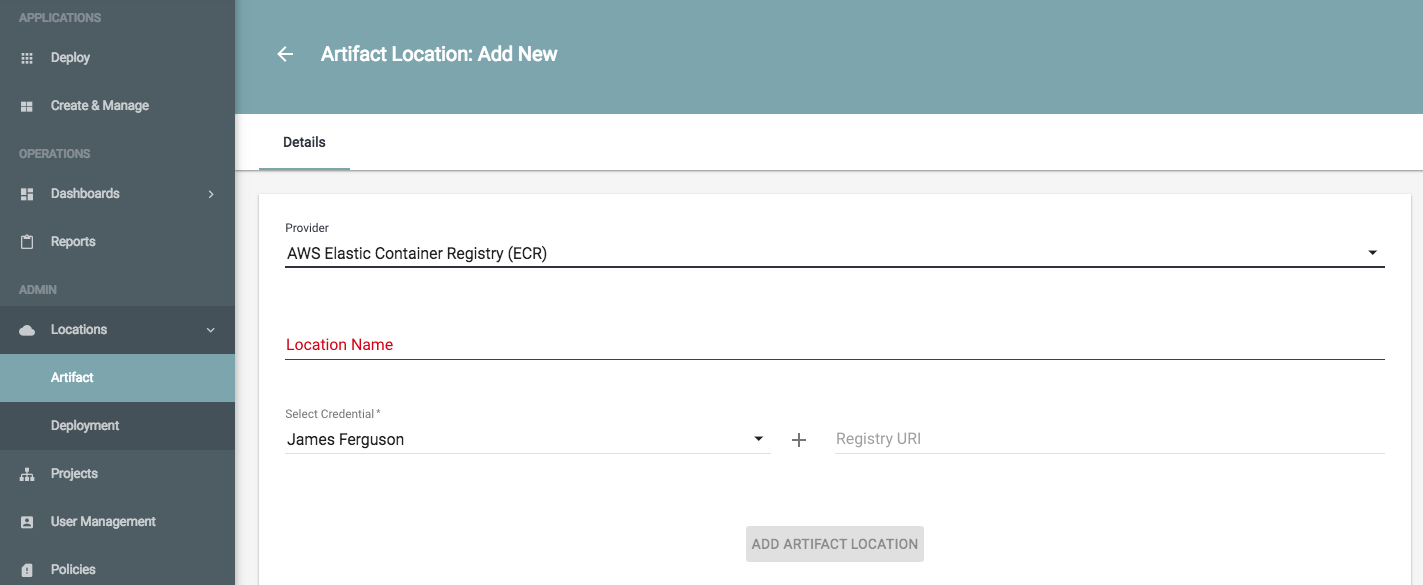
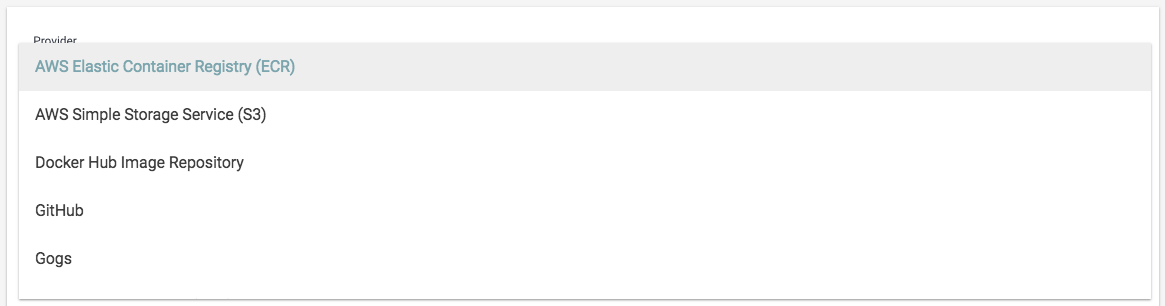
Step 1: Create a repository location definition by choosing where you store your code. You can define as many as you like here. So if using bitbucket, git or ECR, it can use any or all. Choose Provider, Location Name, credentials for the repo and the URI.
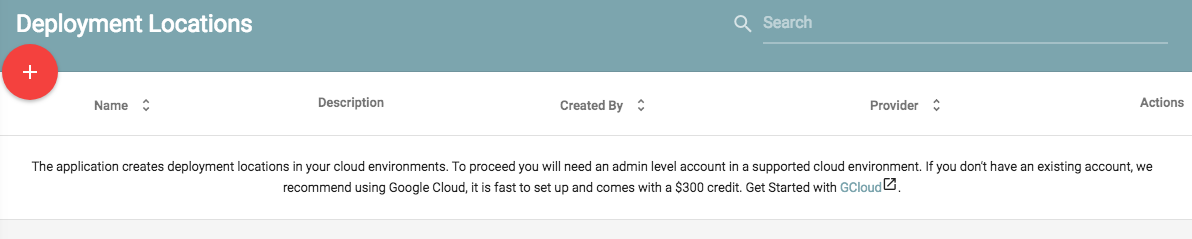
Step 2: Deployment Locations: Once you have your repository, you need to add locations. Locations are defined Cloud Regions or bare metal instances you will deploy your kubernetes cluster nodes to. These definitions and nodes are what the system will use to deploy and manage your stack with.
Click the red +
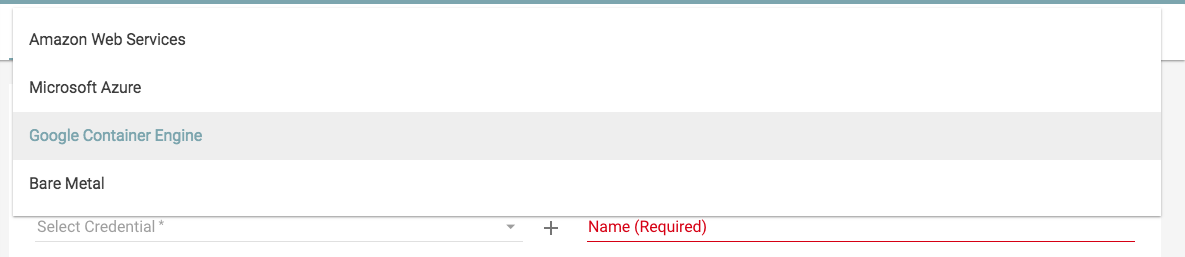
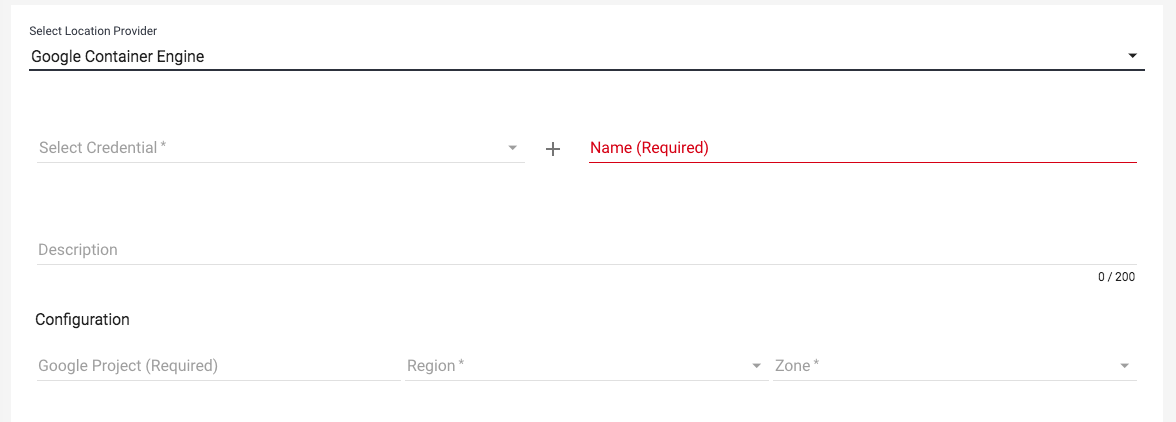
Choose the provider you will be creating the cluster and stack in. Keep in mind, you will need account credentials with admin permissions on the cloud accounts so the system can create the clusters for you. If you dont, be sure to have a system admin or operations admin help
Fill in your cloud credentials and give the location a unique name. Once you have correct credentials filled in, the system will query the CLI for the Region and Zones available for those credentials.
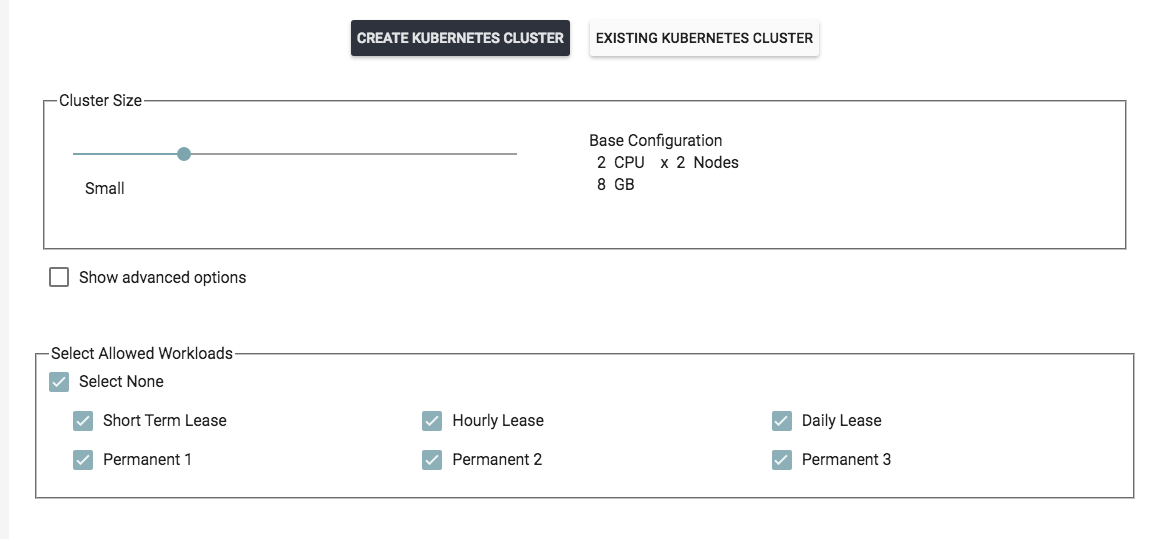
Last Section is to ensure you have your Kubernetes Cluster settings as you like them. If you are not sure what they should be, leave these as they are. We start with a simple auto scale group that should allow you to see it operate in a production like deployment.
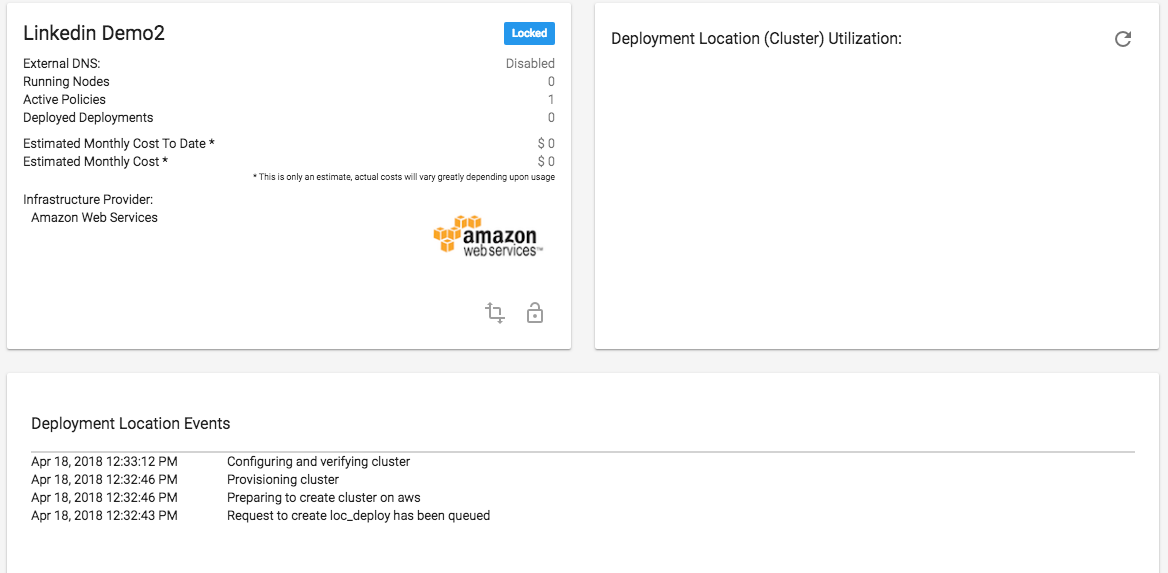
Once done, you will be met with a window that will start creating your cluster and give updates as it completes. Keep in mind, locations are not the same as deploying your stack. A location is defined nodes with a master to provide the envelope for your deployments. This allows you to create multiple locations on different clouds using the same stack for true HA and DR delivery. Keep in mind on each screen, we have created a simple deployment script as well for interacting with our api so that you can run directly from cURL, Postman etc. rather than the GUI.
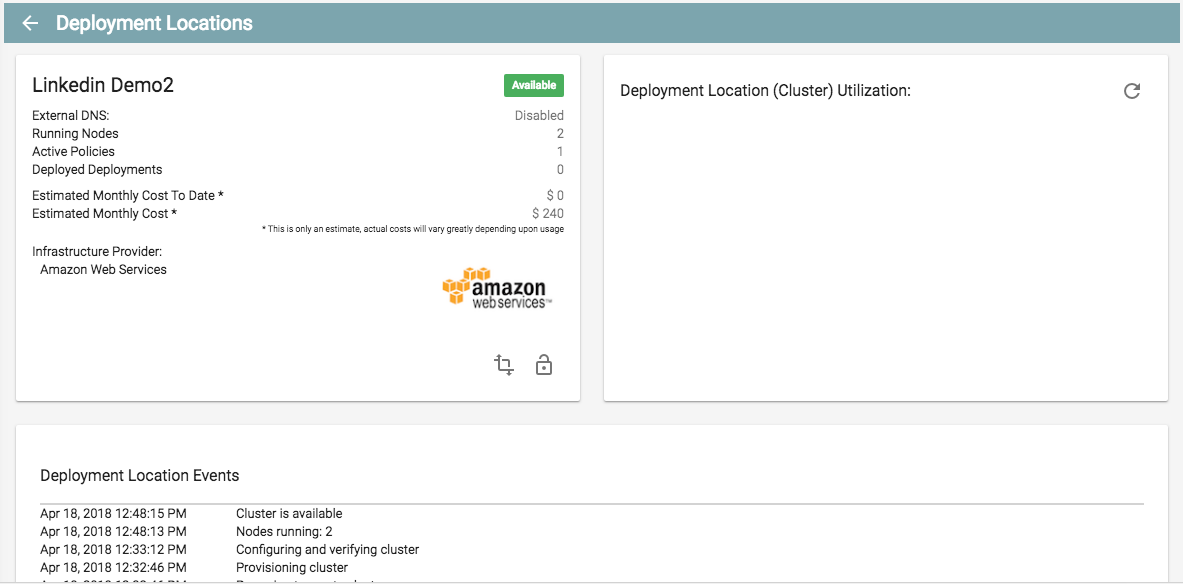
Once Complete, the report will show green with an estimated cost of the cluster and running nodes. You can remove a location at anytime by deleting it. The system will automatically remove the cluster from your cloud or bare metal servers.
By logging into your cloud you can now see your cluster has been created. The domain invertedmobile.com was the domain we chose in the location settings. In your case, that domain will be what you set it to.

Clicking Deployment Locations, we can now see our location is ready and available.

In our next article we will be showing you how to create your stack and deploying to locations with versioning and teams. Part 2 is live here continue reading….
If you would like a demo of the software for a free 30 day evaluation. Please email: support@jbclabs.com or sales@jumpboxcentral.com and we will send you your free login to try for 30 days.